Omni Support
Text Formatting
Learn how to apply and remove formatting of text content.
Headings
Headings not only alter the style, look, and feel of the page, but they also work in giving direction or bearing for accessibility readers, directing them to the next or subsequent sections on a page. Using headings correctly is important to help insure your content meets accessiblity standards.
Headings should be applied in a Hierarchical order (similar to an outline)
Heading 1 <h1>
Heading 2 <h2>
Heading 3 <h3>
Heading 4 <h4>
Heading 5 <h5>
Heading 6 <h6>
Paragraph
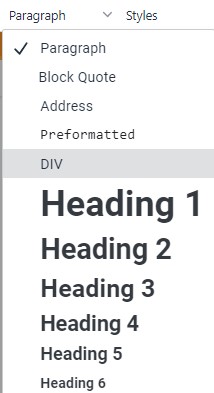
How To Apply an Element from the Format Dropdown
- Select the text you want to apply the element to
- Click the format drop-down from the toolbar
- Scroll to find the element and click it
- This will apply the choice.
Remove or Change the Applied Format
- Place the cursor within an existing block of text, on a blank line, or select the text.
- Click the format drop-down. The applied format will be highlighted.
- Click the currently applied format to deselect it. This will remove the applied format from the selection.
Heading Capitalization Standards
Headings should be capitalized similar to titles of books. The first and last words should start with a capital letter, and all other words except cunjunctions, articles, or prepositions should be capitalized
Preferred Heading Style
This is an Example Heading
Another Good Heading
Don't Capitalize (in middle)
Conjunctions: and, or, but, nor, yet, so, for
Articles: a, an, the
Prepositions: in, to, of, at, by, up, for, off, on
Note for Heading 1
Styles
How to Add Style
The Styles Dropdown is a list of pre-defined styles that can be applied to elements (such as text, images, etc.). Before applying a style, make sure you review the design style guidelines to ensure that you are using the style correctly.
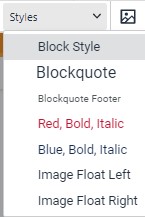
To apply an element from the styles dropdown:
- Select the element (such as text, image, etc.) you wish to apply a style to
- Click the styles drop-down from the toolbar
- Scroll to find the style and click it
- This will apply the choice
Note: You can add multiple styles. After you add the first style, re-select the element and repeat the above steps.
Style Options
Special Text
Red Text. Lorem ipsum dolor sit amet, consectetur adipiscing elit.
Blue Text. Lorem ipsum dolor sit amet, consectetur adipiscing elit.
Red Bold. Lorem ipsum dolor sit amet, consectetur adipiscing elit.
Blue Bold. Lorem ipsum dolor sit amet, consectetur adipiscing elit.
Blockquote
I have no special talent. I am only passionately curious.
Unordered and Order Lists
On the toolbar, the ( ![]() ) btton to add an unordered list or press the (
) btton to add an unordered list or press the ( ![]() ) button to add an ordered list.
) button to add an ordered list.
- Ordered List Item Link
- Ordered List Item no link
- Ordered List Item
- Ordered List Item
- Ordered List Item
Remove Style(s)
- Select the element you wish to remove a style from.
- From the Toolbar menu, click the “Clear Formatting” button.
 This will remove the styles that have been applied to the selected text.
Show Blocks
The "Show blocks" icon![]() can help identify each block of text when in need of organization or with identifying
each block's formatting
can help identify each block of text when in need of organization or with identifying
each block's formatting
- Click on the "Show blocks" icon
 to toggle on/off
- Light outlining should appear around each area/block of text.
- In the top left corner of each block. It should identify that block's text format (h1, ol (ordered list), p (paragraph), etc.)
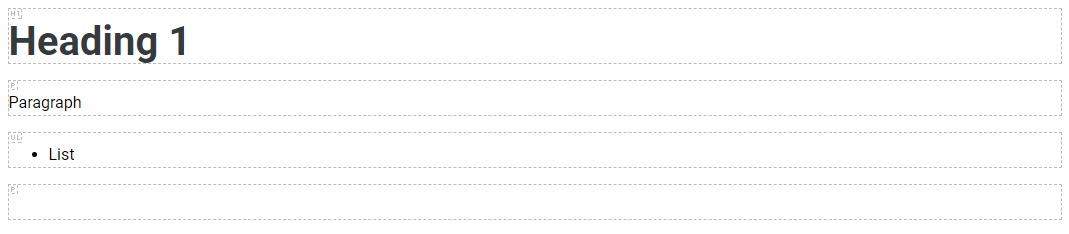
Note: The block outlines only show when the "Show blocks" icon is toggled on and will not appear on live pages.