Omni Support
Getting Started with Omni CMS
If you are new to Omni CMS or need a refresh, this section covers the basics such as logging into the system, making simple edits, and publishing your changes live to the website.
Logging in
To edit any page, login by clicking "Last Updated..." at the footer of the page (bottom of page).

If you have page permissions and loggen in sucessfully, you will be taken to the Omni CMS Edit View. From here, you will be able to update sections of the page that you have access to and will also be able to navigate to other pages you have access to on Omni.
The Interface

- Editable Regions
Indicates an editable area on the page. Click this button to show the editor toolbar. - Status Indicator
The checked in/out icon is represented by a light bulb. - Publish Buttons
Publish changes from staging to production.
Check In/Check Out
The Check In/Check Out system prevents multiple contributors from working on content at the same time and overriding each other’s changes.
The Check In/Check Out Icons
The checked in/out icon is represented by a light bulb and reflects the state of an Omni CMS page or file.
![]()
An unlit light bulb indicates that the page is checked in and can be checked out for editing by any user with the proper permissions.

A lit light bulb indicates that the page is checked out to your account.
![]()
A red lock indicates that the page is checked out to another user. Hovering over the lock icon will reveal whom has the page checked out.
Note: If you need a page unlocked, you can submit a work order to unlock the page you would like to work in.
Top Navigation

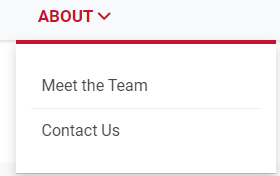
The top navigation menu is how users navigate around your website. Users do not have access to editing the top navigation. To make any changes to your top navigation menus, please submit a work order and admin can assist you.
Dropdown Items

Menu items can be made into a single drop down. The max number of items per drop down is 7.